 Jon Marius Roald
User defined fields in Infor M3 will help you solve real problems, like:
- Breaking the 10-field limit that's been driving you crazy
- Storing additional data without touching core M3 structure
- Creating flexible workflows tailored to your business needs
- Integrating external systems and tools
- Giving users the fields they actually need instead of making them work around limitations
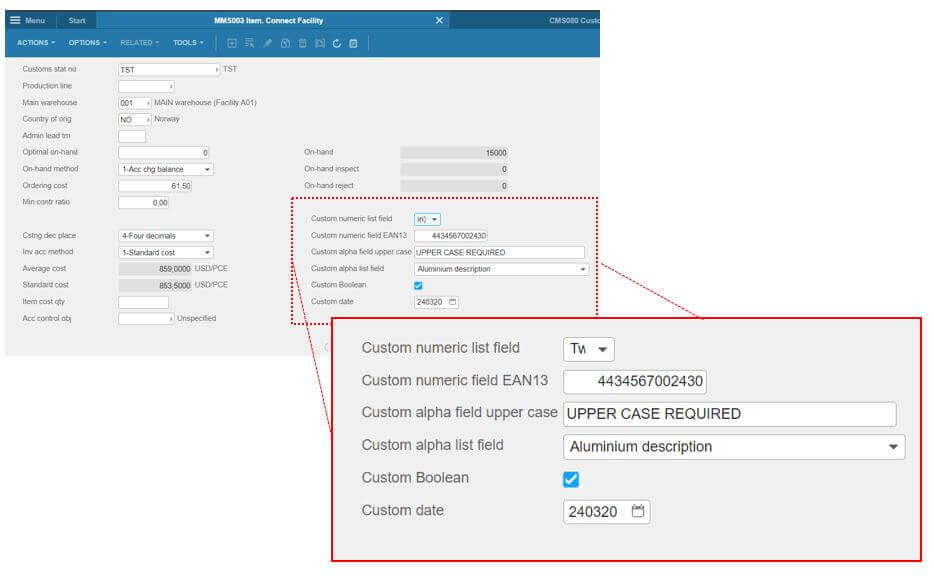
Custom fields are a set of fields in M3 that can be used to extend an existing Infor M3-table, and they can be found right in your programs, like this:
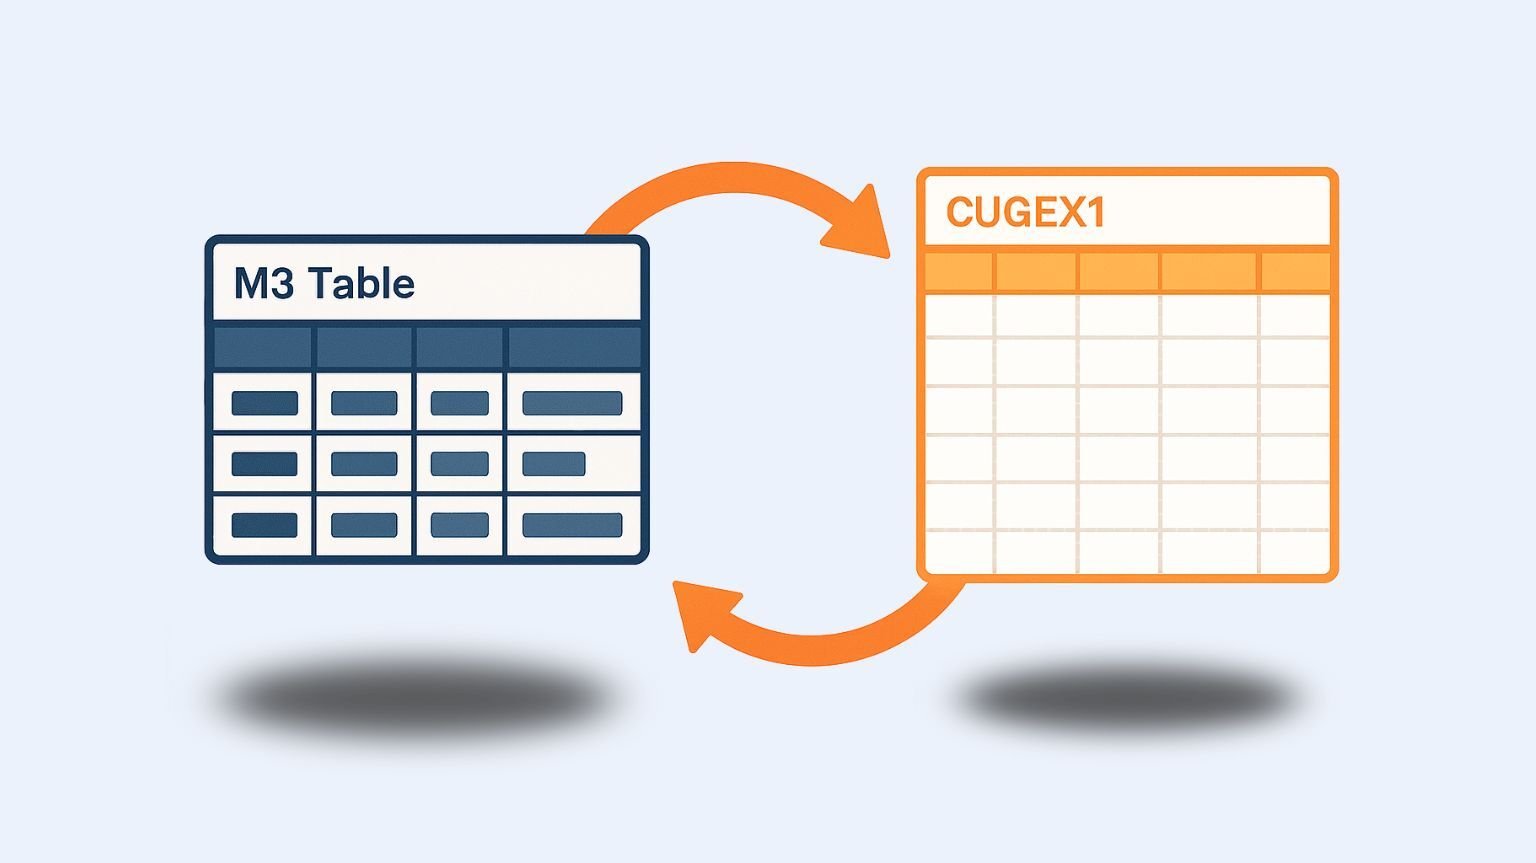
Think of custom fields as your M3 table extensions – but with a twist. They're not direct column additions to your existing tables. Instead, M3 creates a clever link between your table and a CUGEX table.
A CUGEX table is a custom-table in M3. Picture a massive, blank spreadsheet where you can store whatever data you want. The three most popular ones are CUGEX1, CUGEX2, and CUGEX3. We'll focus on CUGEX1 here – it's the star of the show for most use cases.
Setting up custom fields - the CMS080 way
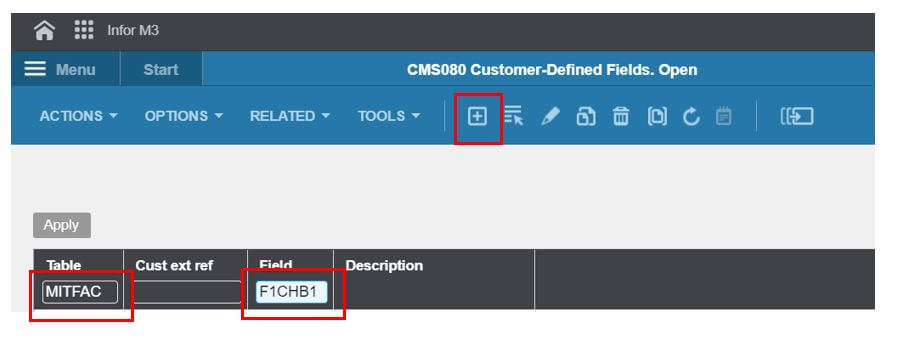
Step 1: Create the Connection
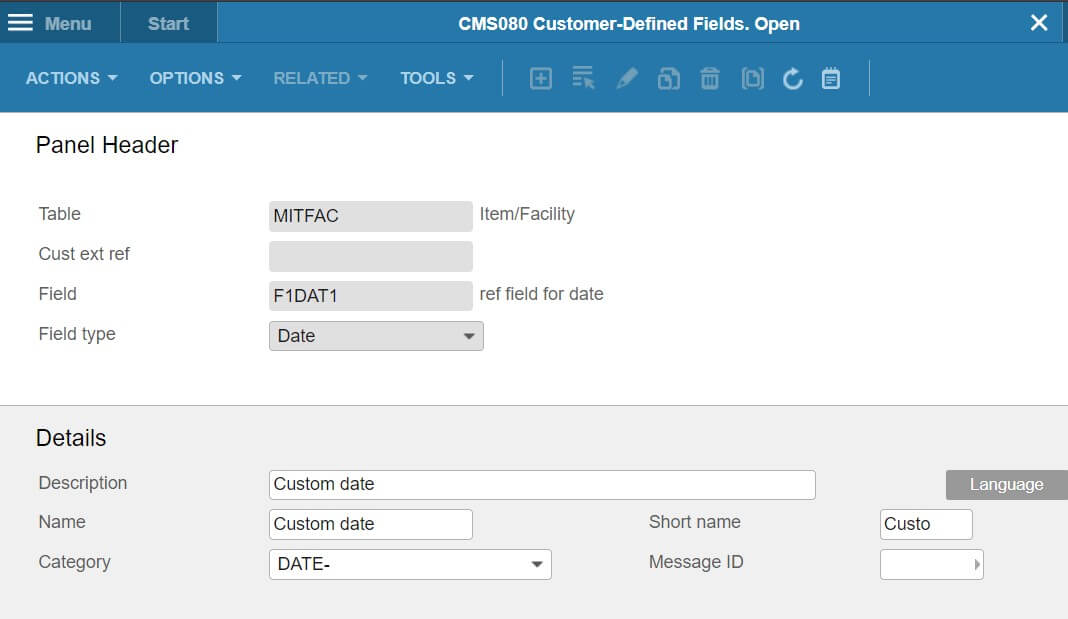
Head to CMS080 and follow these steps.
- Enter your target M3 table (like MITFAC)
- Choose your CUGEX1 field type, for example:
- Boolean fields: F1CHB1 through F1CHB9
- Date fields: F1DAT1 through F1DAT9
- Numeric fields: F1N096 through F1N996
- Text fields: F1A030 through F1A930
- Hit Create (Ctrl+1)
Step 2: Fine-Tune in CMS080/E
Now you will be taken to the details screen. Add your description, set the category and configure field-specific options:
- For Boolean fields: Set the upper limit to 1
- For Date fields: Limited options (M3 knows it's a date)
- For Numeric fields: Add digit checks, validation rules
- For Text fields: Force uppercase, set character limits
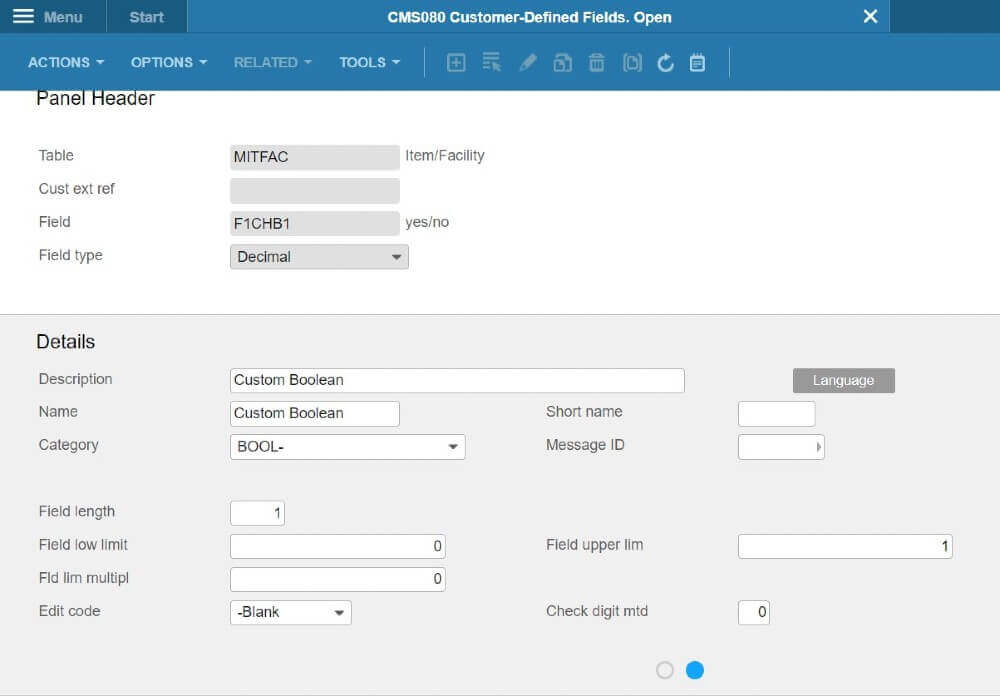
Boolean fields: Remember to set upper limit to 1
Date fields come with limited options, since they are expected to only contain dates
Step 3: Create drop-down lists (optional)
This step is relevant if you want to control what users can enter. In that case, you want to create a value map. This is how you do it.
- Right-click your CMS080 entry
- Select Related options → Value map. You will then be taken to CMS081.
- Define the values you want users to be able to choose from.
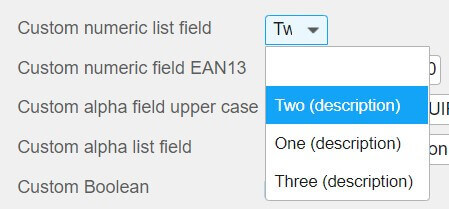
- Set the sequence order. This determines the order they will show up in the drop-down menu.
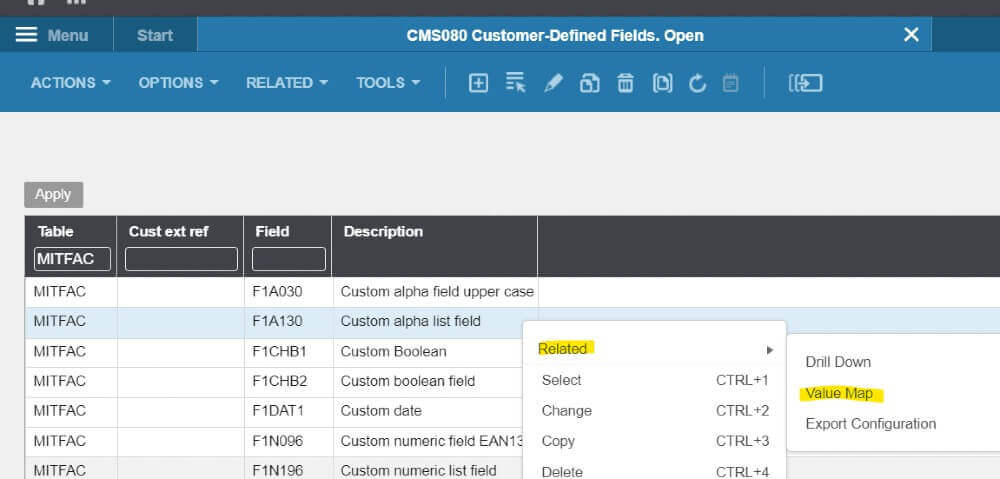
The right click-menu takes you to the value map.
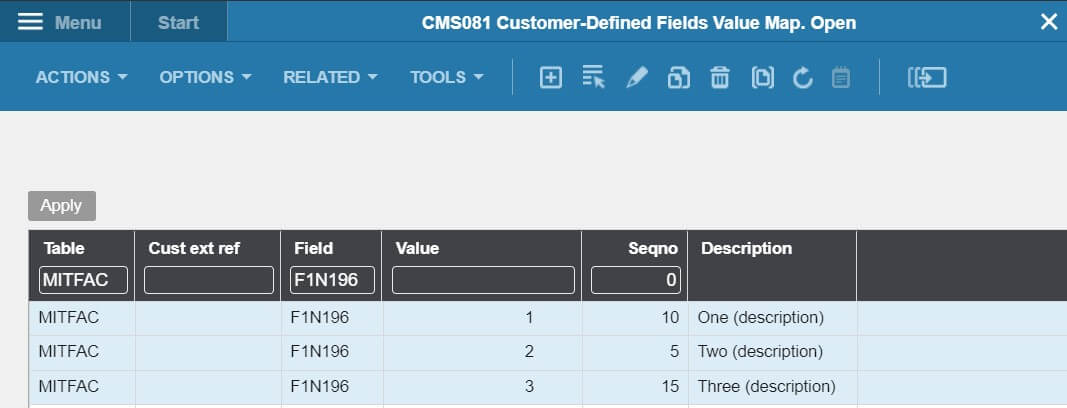
The sequence order number (seqno) determines the order they will show up in the drop-down menu.
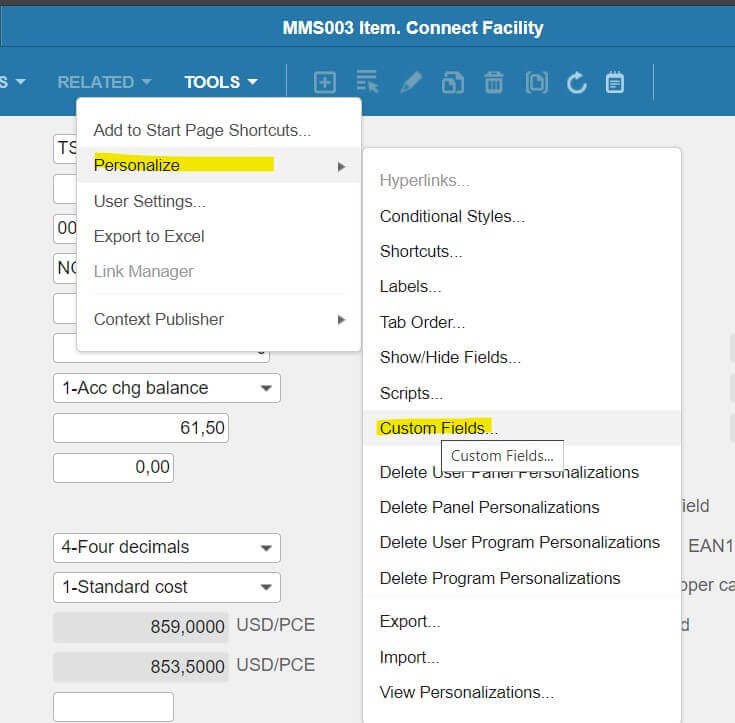
Making custom fields visible in M3 programs
A little note here. This only works in the H5 client. You can set it up in the Smart Office client, but it does require some scripting. We're pretty good at that, so drop us a line and we will help you get it set up!
Here's how to show your new fields:
- Open your M3 program (for example MMS003)
- Navigate to your desired panel
- Go to Tools → Personalize → Custom fields
- Drag and drop fields from the right panel onto your screen
- Share the personalization with other users if needed
Where to find the custom fields.
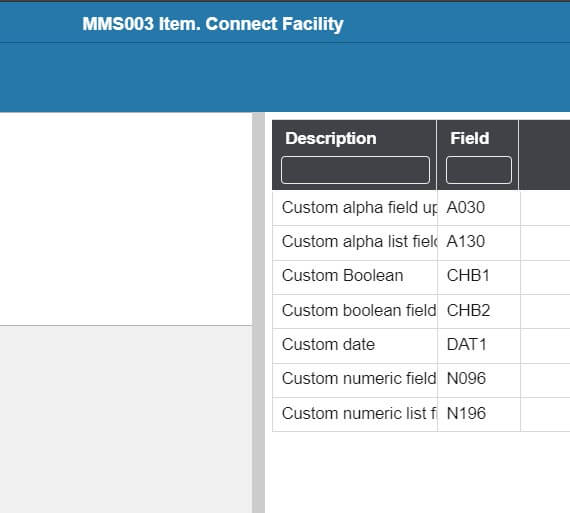
You will find the list of fields you created in CMS080 on your screen’s right side.
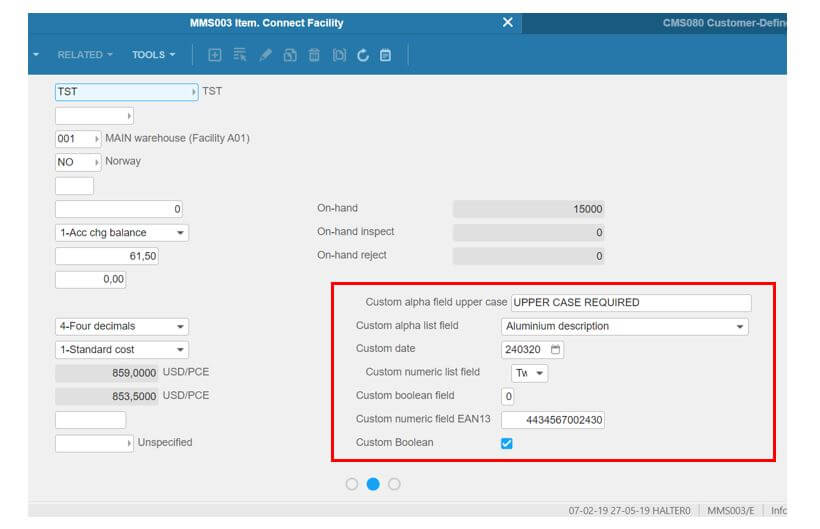
Drag and drop: You're working with an invisible grid, so you can't just plop fields anywhere you want.
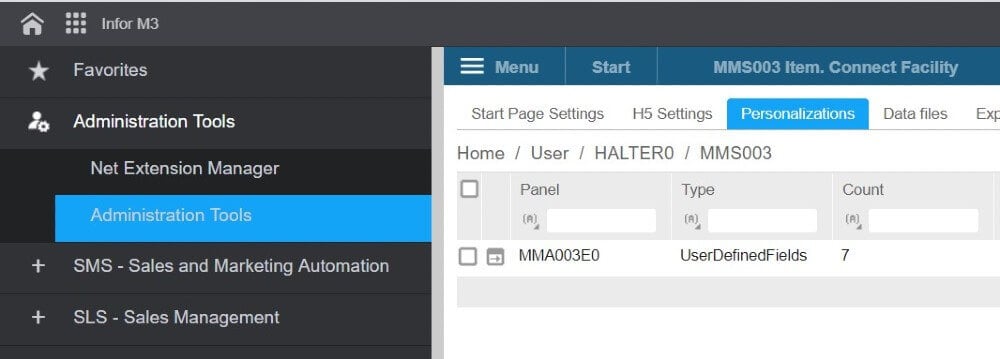
Under Personalizations, the custom fields can be shared between users or made universal between all users/user groups with the proper administrative rights (through administration tools in the H5-client).
Beyond the basics: Advanced custom field uses
Program views – More data, more insights
Add your custom fields to program views in CMS005. Just remember – you're limited to programs that Infor allows (they control the list).
Custom APIs – Integration heaven
Here's where it gets interesting. Link CUGEX1 fields to information categories in CMS010, then use them in custom list APIs via CMS015. This is perfect for integrations with third parties, like the Vince Excel add-in or whatever system you're dealing with.
Bonus: You don't even need to set up CMS080 connections first – you can link CUGEX1 directly to other tables in CMS010.
The CUGEX Resource game
CUGEX1 fields are limited, so you don't want to waste them. Here is a smart strategy:
- CUGEX1: Reserve for fields that need to appear as editable fields in M3 programs
- CUGEX2 & CUGEX3: Use for everything else (unlimited fields, but requires scripting for program display)
Think of CUGEX1 as your premium real estate – only use it when you absolutely need that standard M3 program visualization. For everything else, CUGEX2 and CUGEX3 give you unlimited space.
Need help getting started?
Setting up custom fields can get tricky, especially when you're dealing with complex validation rules, Smart Office compatibility requirements, integration with multiple systems or custom scripting needs.
We've helped countless companies up their M3 game. Get in touch and we'll help get you set up!